Add/Edit/Delete Zoo Items in Joomla
Some content on your site like your blog is located in Zoo. To add, edit, or delete zoo items from your website, use the Zoo Manager. For more information about where a page content is located, visit Page Layout. If you need any help making changes to your website, call Techno Goober for help at (302) 645-7177 or contact us online.
Quick Access:
Open the Zoo Manager
To begin, log into Joomla, your content management system.
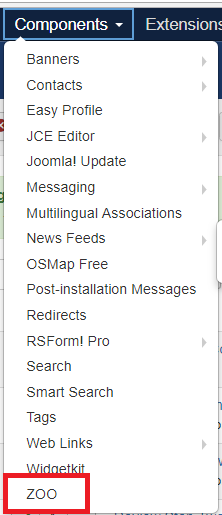
Step 1: Click the Components link at the top of your Content Management System window.
Step 2: Click the Zoo link in the Content drop-down.
How do I edit a Zoo Item?
Step 1: Navigate to the Zoo Manager.
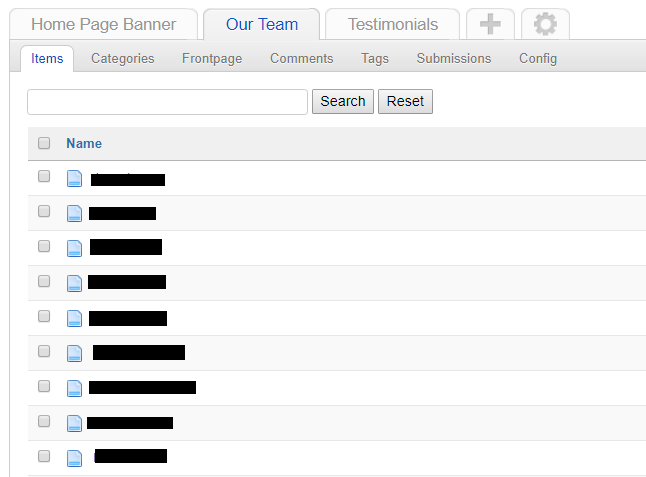
Step 2: Click the appropriate Tab at the top to display the Zoo Items you wish to modify.
Step 3: Click on the title of the Zoo Item that you want to modify.
Step 4: Make the desired changes using the Editor. You can add text and images to your page. Read more about editing text, headings, and links; adding images.
Step 5: Save your changes by clicking Save.
Step 6: Go to the front-end of the website to check out your work. To do this, you can click the name of your website in the top right corner of your screen.
How do I create a new Zoo Item?
Step 1: Navigate to the Zoo Manager.
Step 2: Click the appropriate Tab at the top to display the Zoo Items you wish to modify.
Step 3: Click New at the top left of the screen.
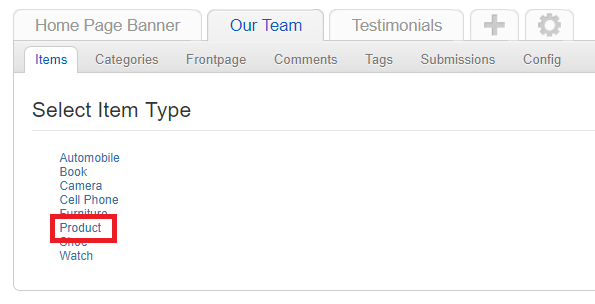
Step 4: Select the Item Type of your Zoo Item. You may want to reference the other Zoo Items on your website to know what Item Type to select.
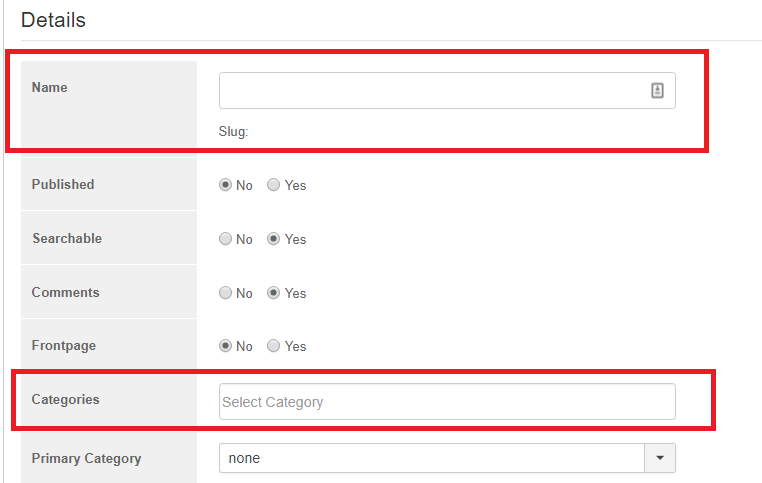
Step 5: Input the details for your Zoo Item. Type in a Name and choose a category.
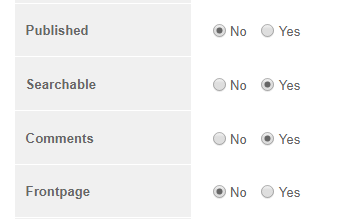
Step 6: Choose the Settings for your new Zoo Item. Choose to Publish the Zoo Item, make it Searchable, allow users to make Comments, and display the Zoo Item first on the list of Zoo Items of this Item Type. For example, for our new employee, we want the employee to display last on the list of employees on our Staff page, so we click NO for Frontpage.
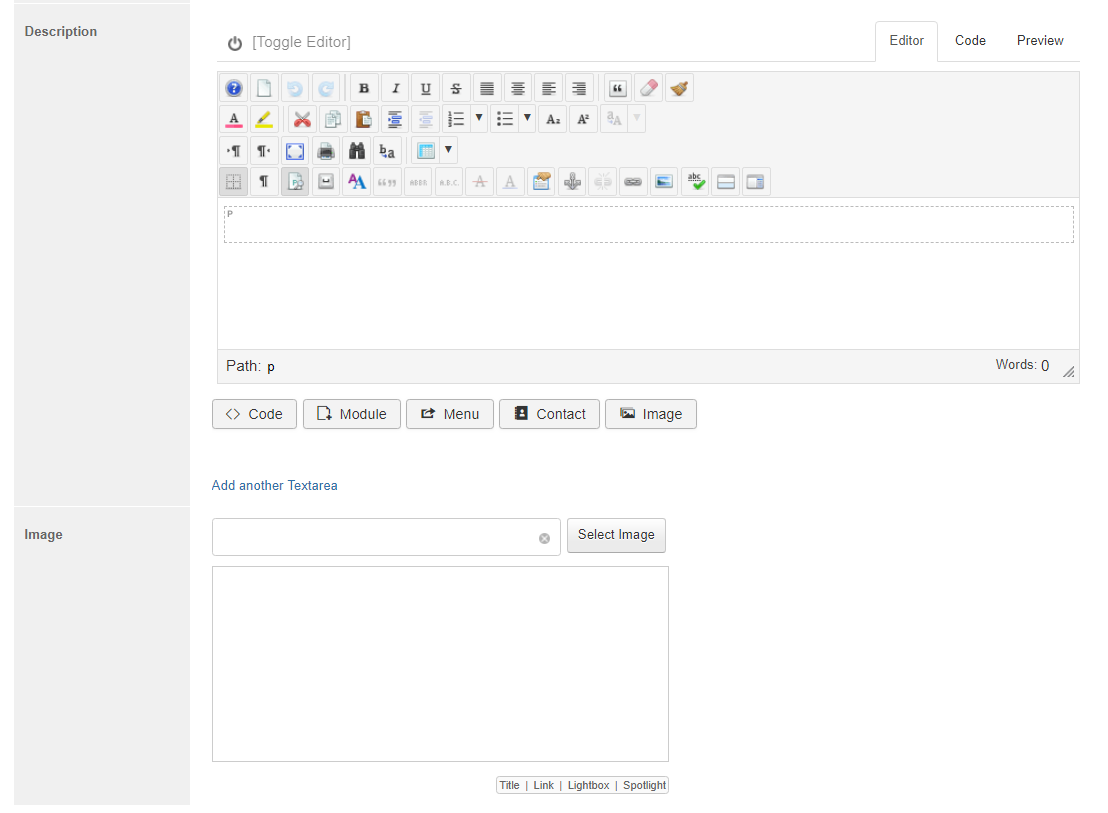
Step 7: Input the Description and Image for the Zoo Item. The Description is the content for the Zoo Item. This would be the blog post content or the Employee name, position, and information. Don't forget to resize your image first. Learn more about adding text in the Editor. Learn more about adding images.
Step 8: When you are finished, click Save.
Step 9: Go to the front-end of the website to check out your work. To do this, you can click the name of your website in the top right corner of your screen.
How do I delete a Zoo Item?
Step 1: Navigate to the Zoo Manager.
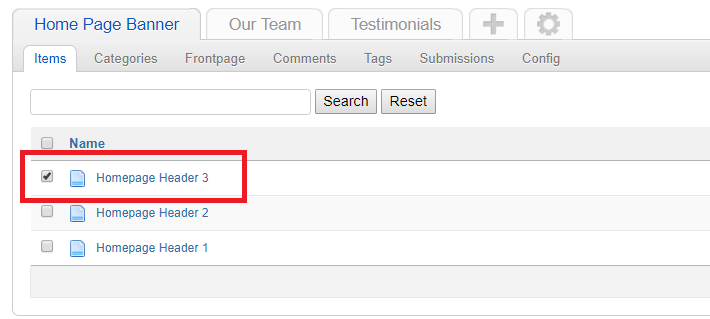
Step 2: Check the Zoo Item you would like to delete.
Step 3: Click Trash.
Step 4: Go to the front-end of the website to check out your work. To do this, you can click the name of your website in the top right corner of your screen.
